
Installing the Certificate
Select your preferred operating system to view the appropriate guide.

Step 4. Installing the certificate
Step 4. Installing the certificate
Step 4. Installing the certificate
Step 4. Trusting the Certificate
Guide for Windows 10
Please follow the steps below. Every step must be followed to ensure that the certificate is installed correctly.Step 1. Downloading the certificate
Click here to download the certificate.
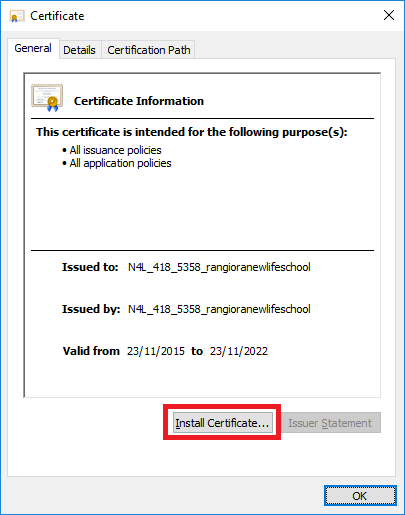
Step 2. Opening the certificate

Step 3. Opening the certificate

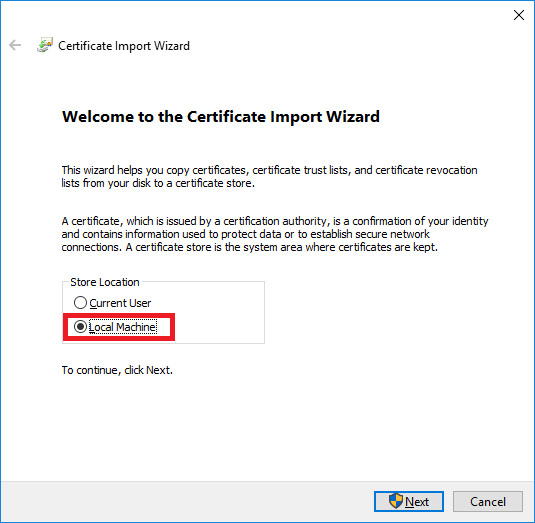
Step 4. Installing the certificate
Step 5. Installing the certificate
Step 6. Installing the certificate
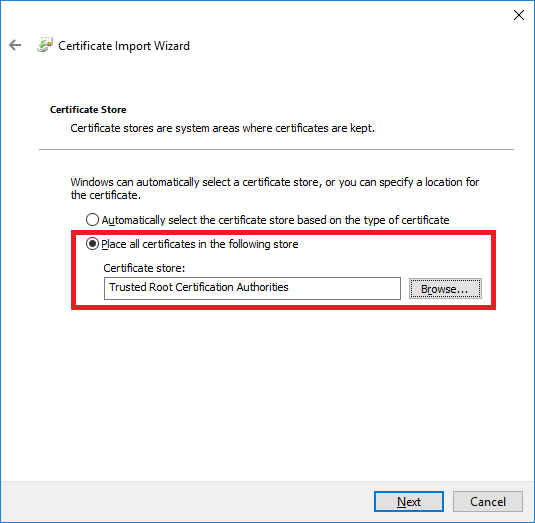
Make sure Trusted Root Certification Authorities is selected!
Step 7. Installing the certificate
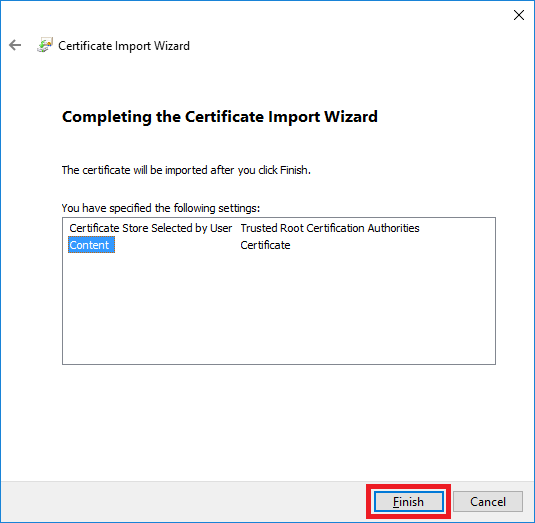
Step 8. Finished!


You can now surf the internet without issues!
Guide for macOS
Please follow the steps below. Every step must be followed to ensure that the certificate is installed correctly.Step 1. Downloading the certificate
Click here to download the certificate.
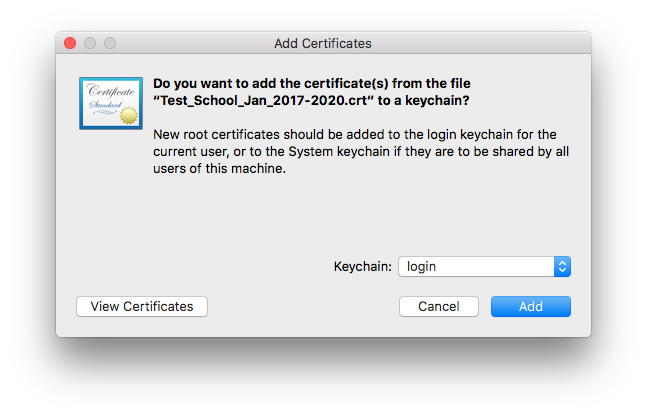
Step 2. Opening the certificate

Change keychain to System, then clck Add.
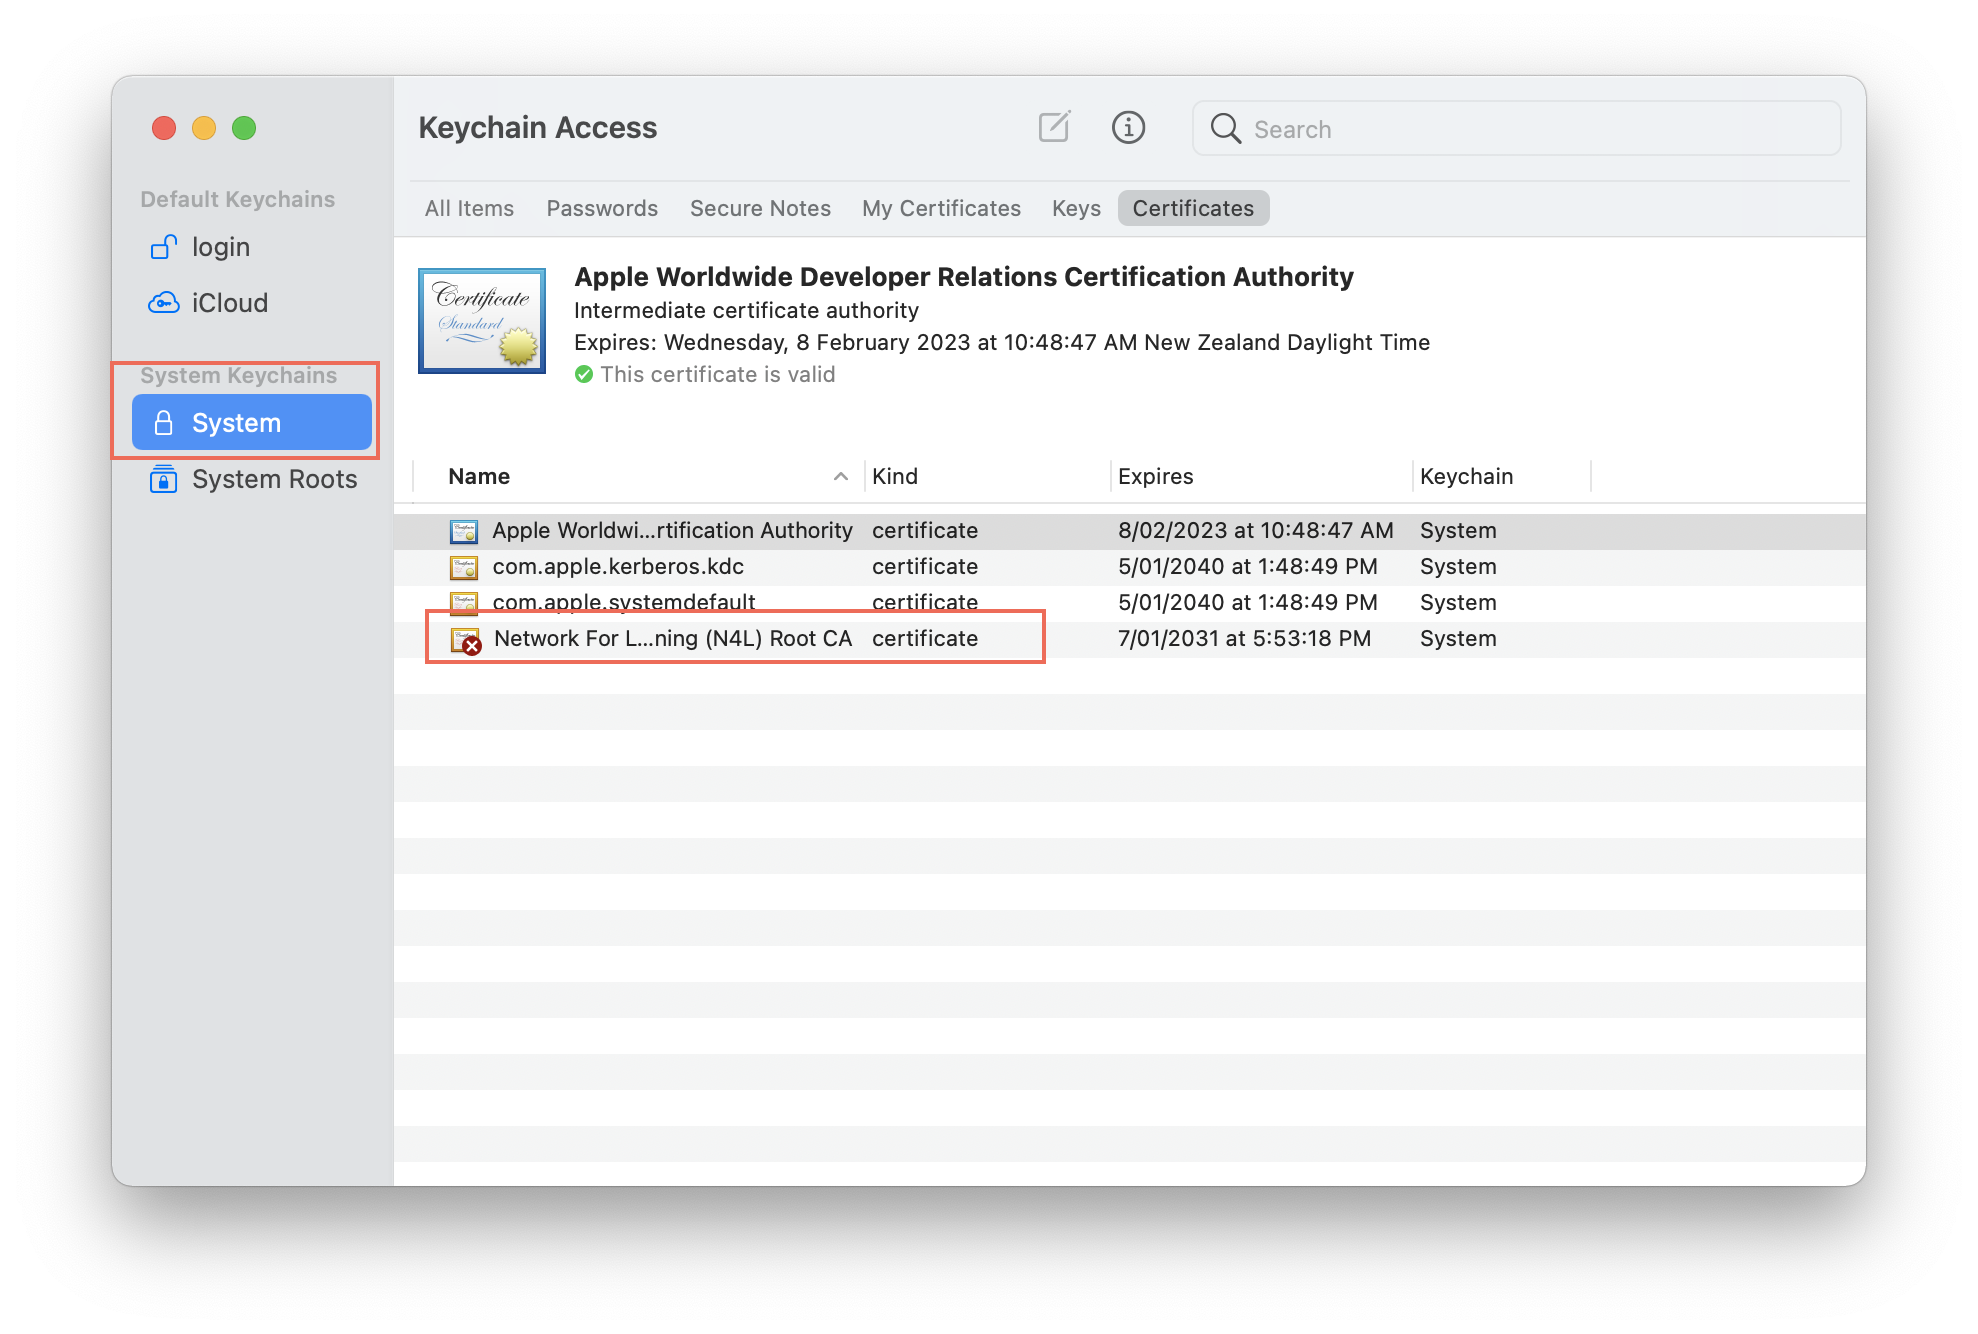
Step 3. Open Keychain Access

After opening Keychain Access select System on the left, then double click on the Network for Learning cert.
Step 4. Installing the certificate
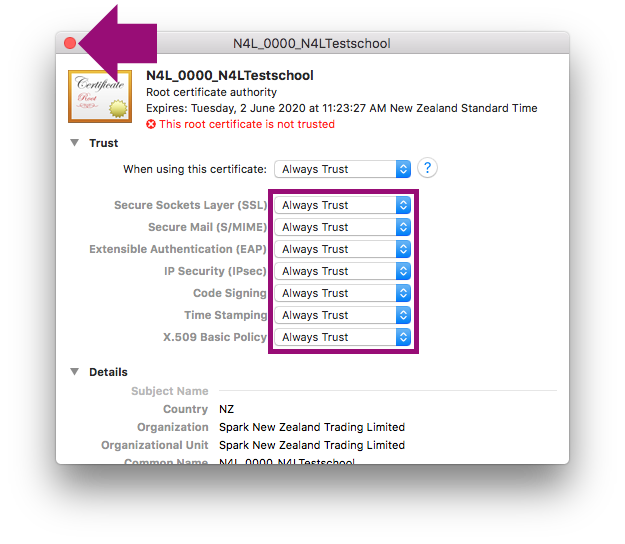
After opening, expand Trust and set all of the Drop-Downs will change to Always Trust, then close.
Step 5. Finished!

You can now surf the internet without issues!
Guide for ChromeOS
Please follow the steps below. Every step must be followed to ensure that the certificate is installed correctly.Step 1. Downloading the certificate
Click here to download the certificate.
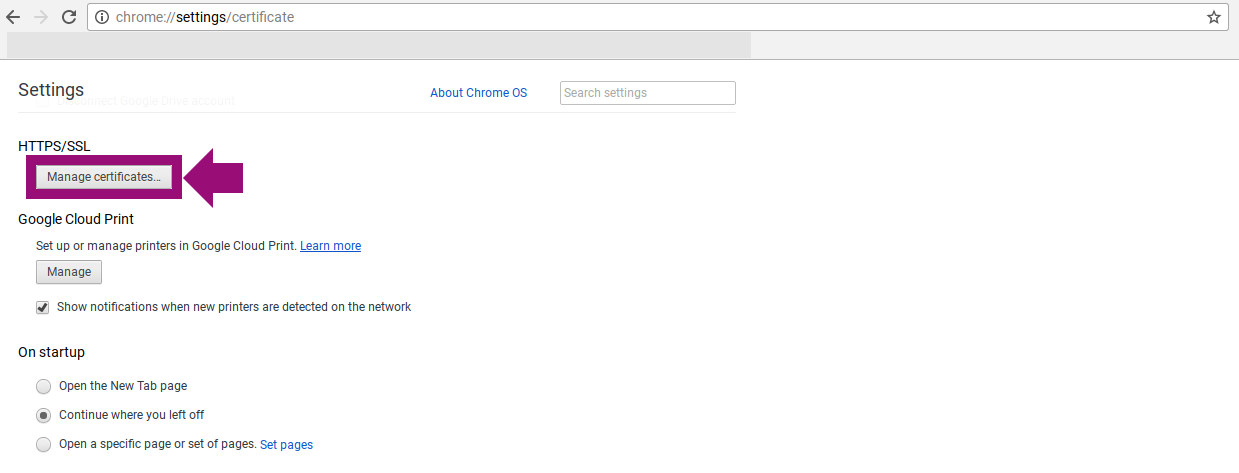
Step 2. Opening Settings

Navigate to chrome://settings, scroll down to HTTP/SSL settings and Click Manage certificates.
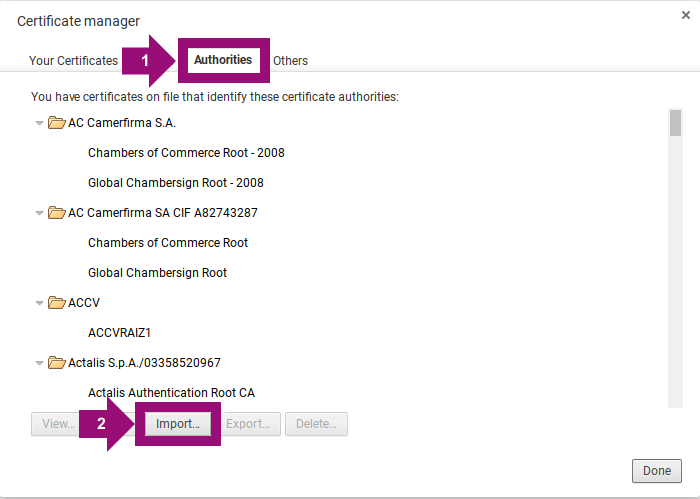
Step 3. Certificate Manager

In Certificate Manager, click Authorities, then at the bottom, click the Import button
Step 4. Installing the certificate
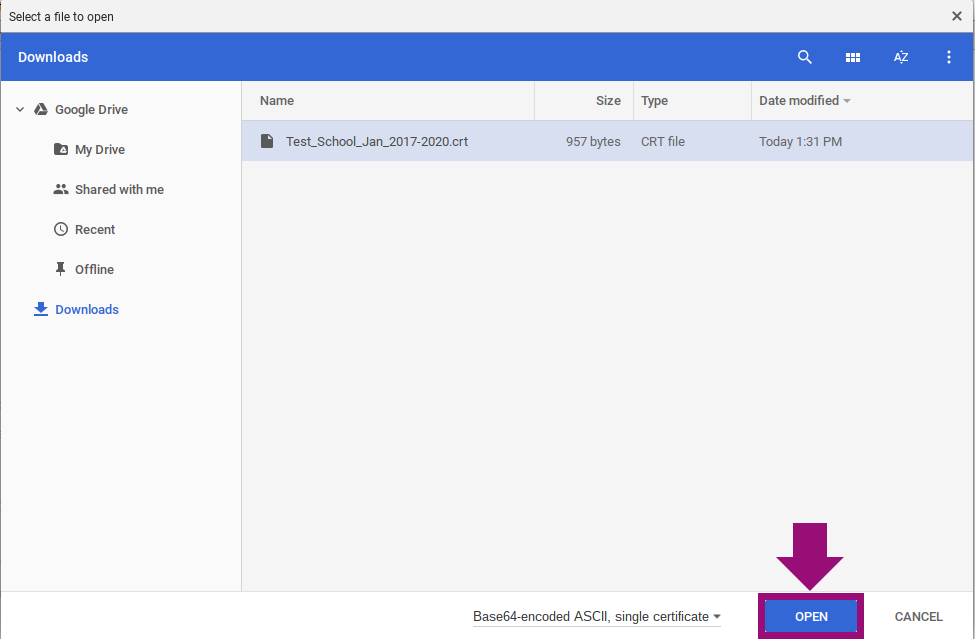
Locate the certificate you downloaded earlier, and click Open.
Step 5. Installing the certificate
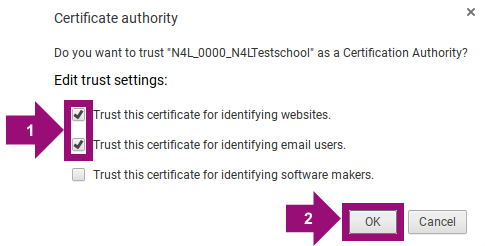
In the Certificate authority window that appears, tick Trust this certificate for identifying websites and Trust this certificate for identifying email users, then OK.
Step 6. Finished!


In the Certificate authority window that appears, tick Trust this certificate for identifying websites and Trust this certificate for identifying email users, then OK.
Step 6. Finished!
You can now surf the internet without issues!
Guide for iOS
Please follow the steps below. Every step must be followed to ensure that the certificate is installed correctly.Step 1. Downloading the certificate
Click here to download the certificate.
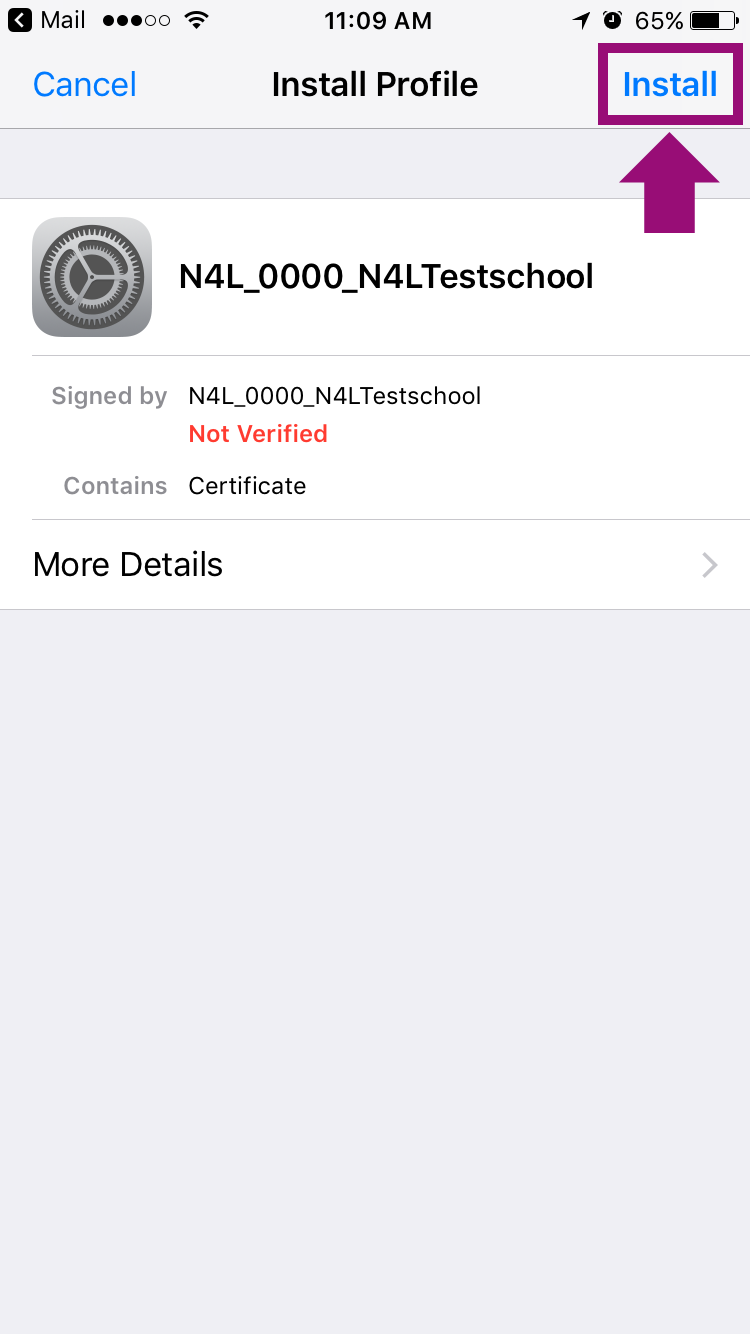
Step 2. Opening Settings

The Install Profile screen will be displayed, click Install.
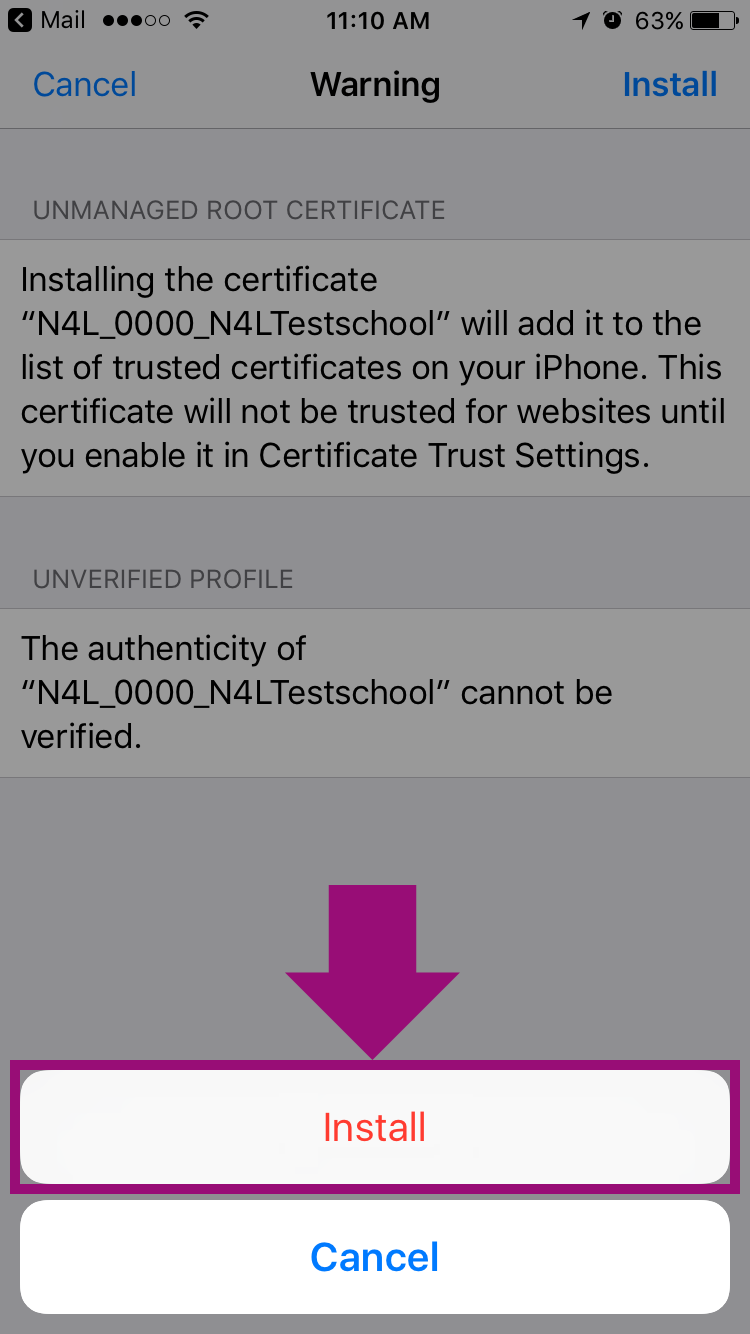
Step 3. Confirm Install

A certificate warning will be displayed. Tap Install. If a second prompt is displayed, tap Install again.
Step 4. Trusting the Certificate
On the device, go to Settings > General > About > Certificate Trust Settings.
Step 5. Trusting the certificate
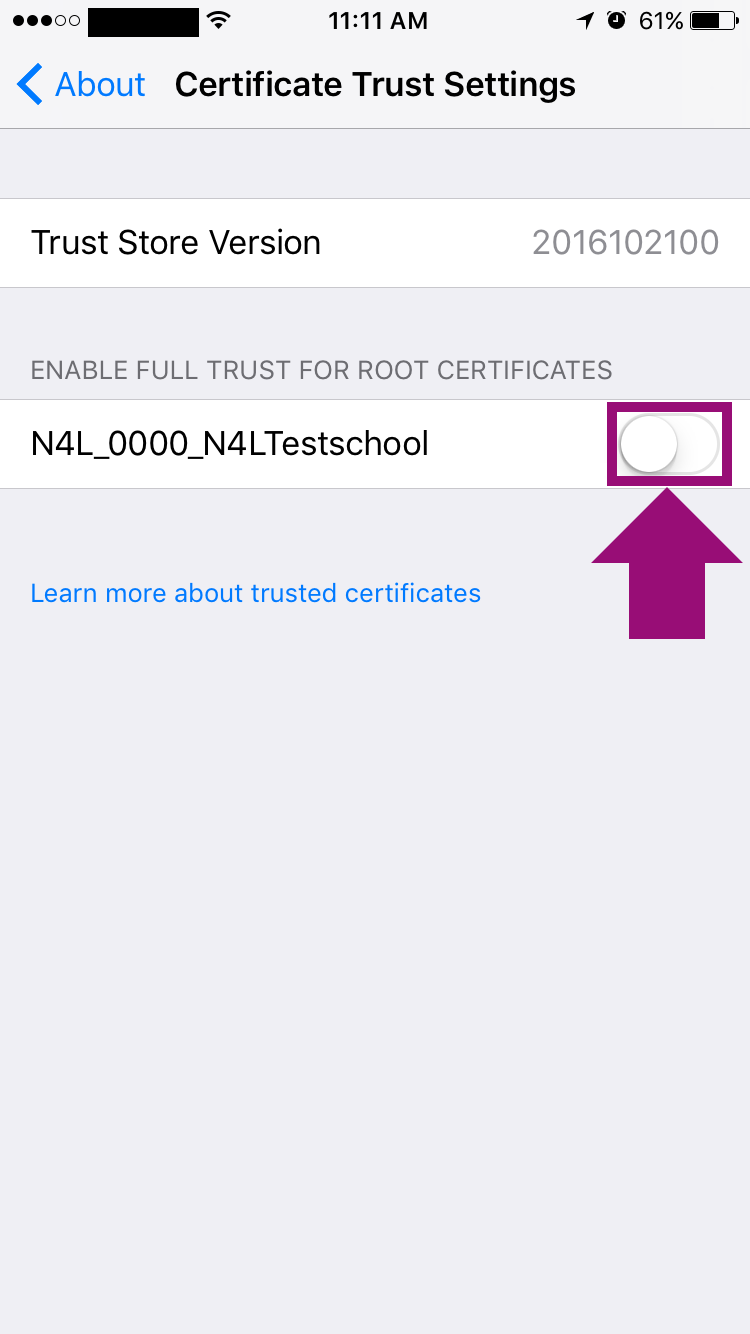
The installed Root Certificates will be displayed in a section entitled "Enable Full Trust for Root Certificates.". Tap the toggle to enable.
Step 6. Finished!

The installed Root Certificates will be displayed in a section entitled "Enable Full Trust for Root Certificates.". Tap the toggle to enable.
Step 6. Finished!
You can now surf the internet without issues!
Guide for Android
Please follow the steps below. Every step must be followed to ensure that the certificate is installed correctly.Step 1. Downloading the certificate
Click here to download the certificate.
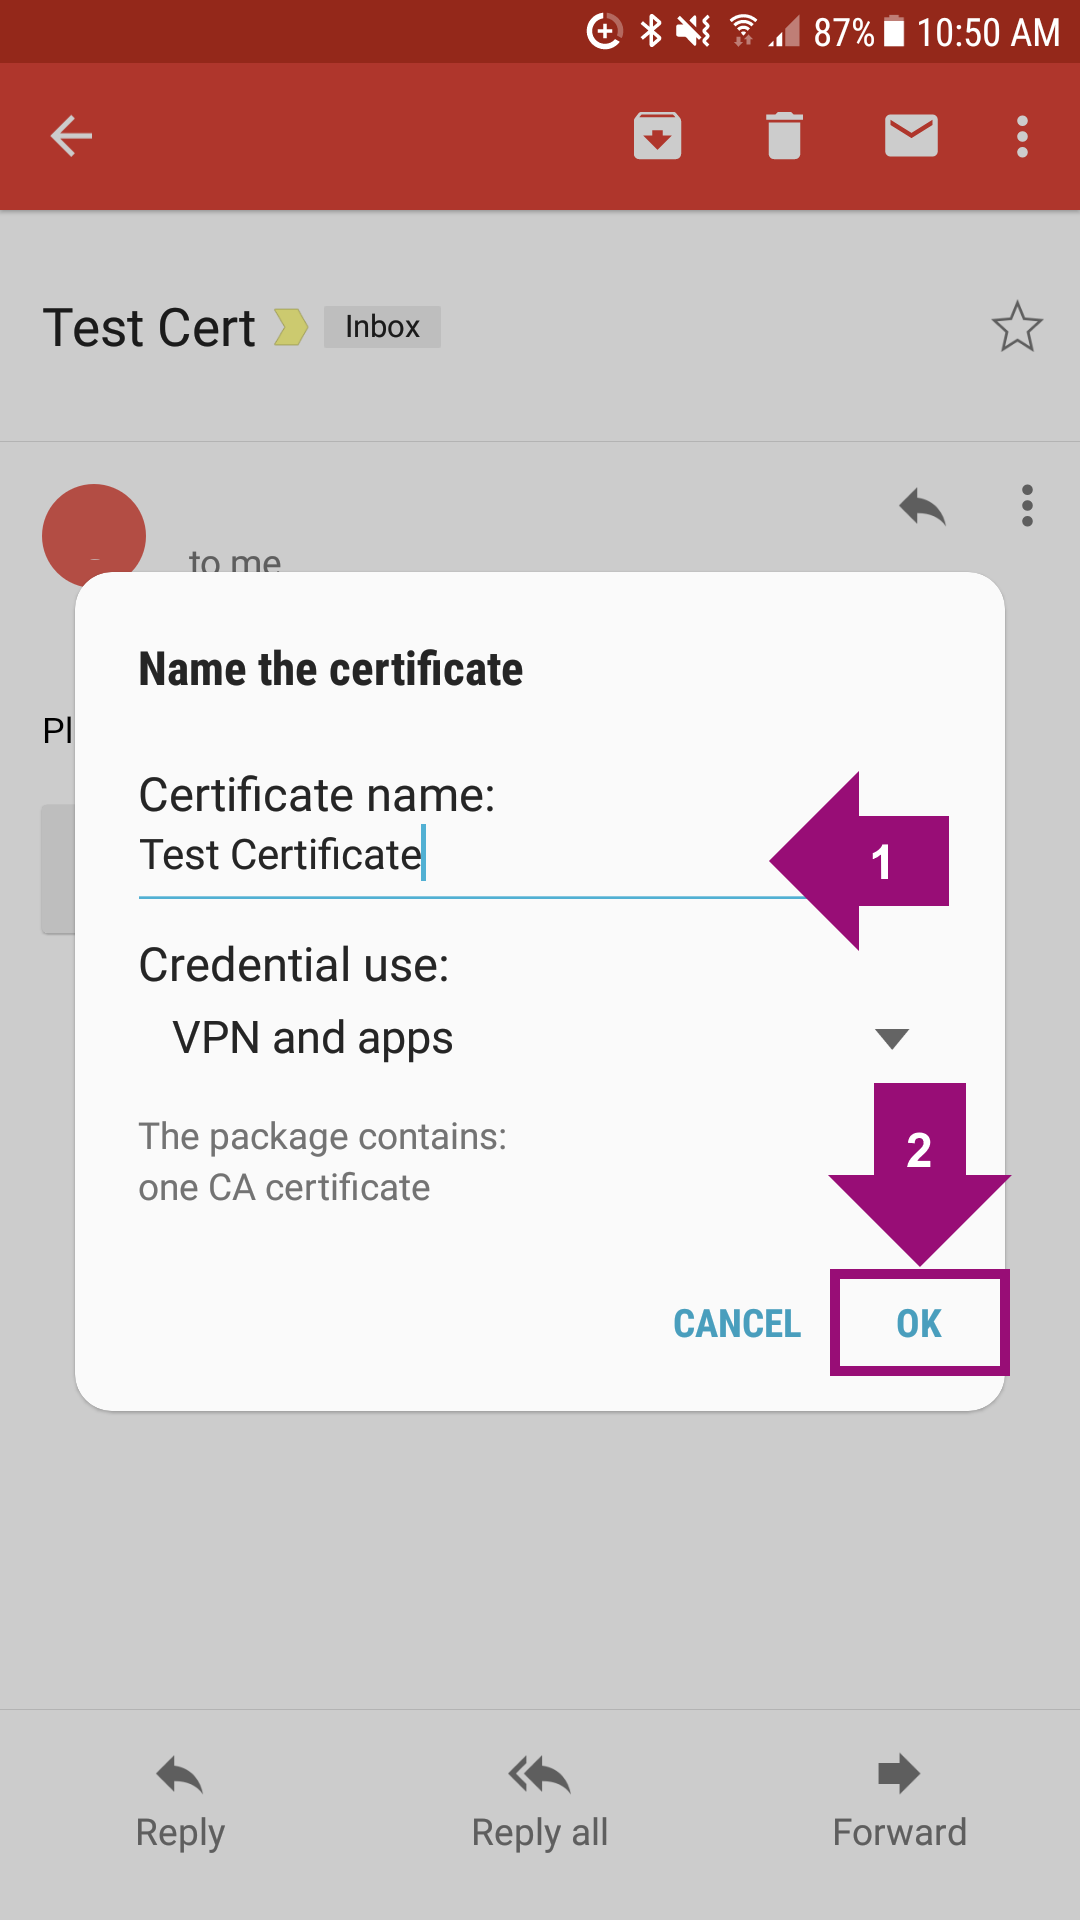
Step 2. Name the certificate

Name the certificate, e.g. RNLS
Step 3. Finished!
You can now surf the internet without issues!